Best Greenhouse for Beginners: A Backyard Buying Guide
Choosing a first backyard greenhouse: how big to go, a level base, anchoring, venting, watering, what to grow first, permits and HOA rules, and kits that fit.
At a glance
A good first greenhouse is a 6x8 walk-in on a level base, anchored and vented. The Outsunny 6x8 Walk-In Polycarbonate Greenhouse is the straightforward starter, the Palram Canopia Mythos 6x8 adds twin-wall panels, and the Palram Canopia Hybrid 6x8 publishes wind and snow ratings. Check permits and HOA rules first.

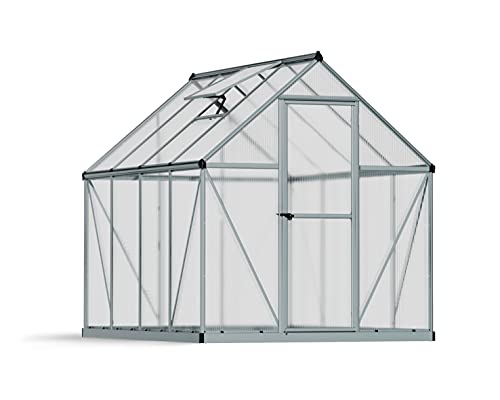
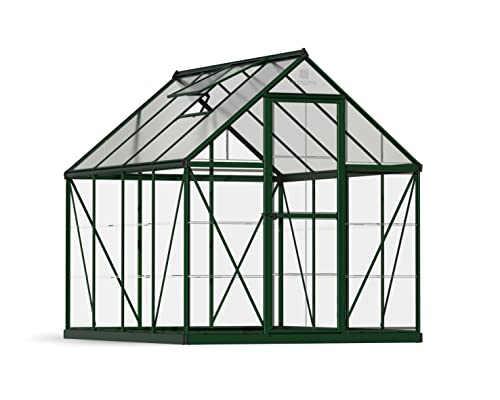
A first greenhouse is exciting and a little risky. The kit arrives in a few boxes, the instructions look simple, and the real difficulties show up later: a crooked base, a door that sticks, a July afternoon that cooks your seedlings, a windy night when the whole structure shifts. Almost all of those problems come from choices made before you open the first box. This guide walks through the decisions that matter, then points to the kits from our list that suit a beginner in a backyard.
We have not assembled or handled any of these kits. We compared what manufacturers publish and what university extension services recommend, and we mention where a number is missing. For the full ranking, see the best greenhouses of 2026.
Size Up From Your First Idea
Many people who buy a small greenhouse wish it were bigger within a season. University of Georgia Extension tells readers to choose the largest size the site and budget allow, to make it as wide as possible since widening is harder than lengthening, and to make it 25% to 50% larger than initial needs because collections tend to grow. The same bulletin suggests planning for about two-thirds bench space and one-third walkway, with walkways of 18 to 19 inches for servicing benches only and 24 to 30 inches if you want a wheelbarrow or a visitor.
For a beginner, the 6x8 class is a common starting point. These kits have a footprint of about 8 ft by 6 ft, which is roughly 49 sq ft: enough for a bench along each side and a narrow aisle, and not so large that heating, venting and filling it become a project. If your yard and budget allow more, an 8x8 or a long tunnel gives you room to grow.
Pick the Spot Before the Kit
North Carolina State Extension says to choose a level, well-drained plot, to avoid low areas surrounded by woods or buildings, and to make sure water and electricity are easy to reach. University of Georgia Extension says the south or southeast side of a house gets the most sunlight from November to February, with some afternoon shade from deciduous trees helpful in summer, though you should watch for falling limbs. University of Alaska Fairbanks Extension recommends at least 8 hours of direct sun per day. Check your yard on a clear day at several times and write down what you find.
Also think about where the wind comes from. A greenhouse next to a fence or a hedge, but not under it, takes less abuse than one in the open.
Build a Level Base
The base matters more than the kit. North Carolina State Extension says to level the foundation boards, and if the site is not flat, to dig a trench on the high side rather than raise the low side. It also says to keep the top of the foundation at or above ground level, especially at the door, to keep rainwater out. A twisted base is the usual cause of doors that bind and panels that leak.
Most kits ship without a floor. Palram says the Hybrid has no floor or base included, and Outsunny’s 6x8 comes with a galvanized steel base that forms the frame perimeter, which is a base for the walls and not a floor. A common approach is a pressure-treated timber frame on compacted gravel, or a concrete slab, with the kit’s base fastened to it. Gravel gives you drainage, and a floor inside can be mulch, pavers or soil, depending on what you want to grow.
Anchor Everything
Light kits lift. Outsunny’s 6x8 weighs about 76 lb, and the company recommends placing it against an out-of-wind wall and securing it with the ground bolts. The Palram kits come with their own anchoring instructions. North Carolina State Extension describes corner posts that anchor a structure against high winds. In plain terms: use every anchor point the maker provides, add more if your site is exposed, and do it before the first windy day, not after.
Vent Early, Vent Often
Overheating is the most common beginner problem. University of New Hampshire Extension says small greenhouses can overheat even on cool, sunny spring and fall days, and it strongly recommends an automatic vent opener for the spring and fall plus roll-up sides for summer. North Carolina State Extension notes that opening the door usually fixes overheating. University of Alaska Fairbanks Extension gives a general rule that total vent area, roof plus sides, should be about 20 to 30 percent of floor area. Many kits fall short of that on paper, so plan to prop the door open on warm days and add shade cloth in summer.
Install a thermometer that records the high and low. It will show you what happens when you are away at work, and it will help you decide whether to buy an automatic vent opener. It is one of the best small upgrades available.
Watering and Humidity
A greenhouse dries out quickly on hot days and stays damp on cool ones. Water in the morning so leaves dry before night, keep a hose or watering can close, and group plants by how much water they need. Good drainage under benches helps, and so does leaving some airflow. A closed, humid greenhouse in cool weather is where gray mold and damping-off appear. If you see them, open the vents.
What to Grow First
University of New Hampshire Extension gives a useful beginner calendar for a cold climate. Start cold-tolerant seedlings such as cabbage, kale, broccoli, leek, onion and spinach in April for later transplanting. Grow tomato, pepper and eggplant in large pots after mid-May to get fruit sooner than outdoors. Avoid starting warm-season seeds in an unheated greenhouse in early spring, because young plants can chill. For fall, spinach, kale or collards planted in the ground in August or early September, with row cover, can extend harvests into winter. Adjust all those dates to your own frost dates.
Start with a few crops you actually eat. A greenhouse full of lettuce and herbs teaches you more than one full of difficult plants, and success builds the habit.
Permits and HOA Rules
University of Georgia Extension says building permits are usually required for a greenhouse. Many cities exempt small accessory structures below a size threshold, and the threshold varies. Call your building department and ask. If you live in an HOA, ask about color, height, visibility from the street and setbacks, and get the answer in writing.
Which Kits Fit a Beginner
Outsunny 6x8 Walk-In Polycarbonate Greenhouse: The Straightforward Starter
A walk-in kit with 4 mm polycarbonate panels, a hinged roof vent and a sliding door. A fit for a first greenhouse in a sheltered backyard.
According to the Outsunny listing, the greenhouse measures about 99.25 by 74.75 by 79.25 inches and weighs 76.1 lb. Outsunny says the panels are about 0.16 inch (4 mm) thick, the frame is powder-coated aluminum on a galvanized steel base, and the kit has a hinged roof vent, a sliding door, rain gutters, ground bolts and diagonal braces. We could not open a maker page for it, so we do not quote wind or snow ratings. It suits a mild-climate or sheltered yard, and you must anchor it well. See our Outsunny 6x8 profile.
Palram Canopia Mythos 6x8: Twin-Wall All Around
Twin-wall panels all round, a galvanized steel base and two roof vents. A fit for beginners who want better insulation and more venting in the same footprint.
Canopia by Palram lists twin-wall polycarbonate panels on every side, a heavy-duty rust-resistant aluminum frame, a galvanized steel perimeter base and two manually adjustable roof vent windows, with a footprint of about 8 ft 1 in by 6 ft 1 in. The extra vent is a real plus for a beginner who is still learning how fast a greenhouse heats up. We did not find a published wind or snow rating. Our Mythos 6x8 profile has the details.
Palram Canopia Hybrid 6x8: Published Ratings
A twin-wall roof, clear walls and published wind and snow ratings. A fit for beginners in windy or snowy areas who want numbers to rely on.
According to Canopia by Palram, the Hybrid has a 4 mm twin-wall diffused roof, clear polycarbonate walls with over 90% light transmission, a powder-coated aluminum frame, a manual roof vent and a built-in gutter. Palram says it withstands winds up to 56 mph and 15 lb per sq ft of snow, and it has a 5-year limited warranty. It has one roof vent and no included base. See our Hybrid 6x8 profile.
Quictent 20x10 Tunnel: A Lot of Space, Low Commitment

A large PE-covered tunnel on a steel frame with two doors and eight windows. A fit for a big seasonal growing area without a permanent base.
Quictent’s spec table gives about 19.7 by 9.8 by 6.6 ft, roughly 200 sq ft, with a two-layer PE cover over a steel frame, two zippered doors and eight windows, anchored with U-type stakes. It is a seasonal structure: the cover does not insulate like polycarbonate, it does not shed heavy snow well and it needs careful anchoring. It is also big enough that permits and HOA rules deserve a conversation. Read the Quictent tunnel profile before you commit.
A Short Starter Checklist
- Check permits and HOA rules.
- Pick a sunny, level, sheltered spot.
- Size up from your first idea.
- Build a level base before the kit arrives.
- Anchor every point.
- Buy a high-low thermometer and an automatic vent opener.
- Start with a few easy crops.
Sources
- A Small Backyard Greenhouse for the Home Gardener (N.C. Cooperative Extension)
- Very Small Greenhouses for Back Yards (University of New Hampshire Extension)
- Hobby Greenhouses, Bulletin 910 (University of Georgia Cooperative Extension)
- Greenhouses for Home Gardeners in Alaska (University of Alaska Fairbanks Cooperative Extension)
Frequently asked questions
What size greenhouse should a beginner buy?
Go a size up from what you think you need. University of Georgia Extension advises choosing the largest size your site and budget allow, and making it 25% to 50% larger than your initial needs because collections tend to grow. In practice, 6x8 is a common first walk-in size, and the footprint is about 8 ft by 6 ft.
Do I need a foundation for a small greenhouse kit?
You need a level base. North Carolina State Extension says to level the foundation boards and keep the top at or above ground level, especially at the door, to keep rainwater out. Most kits do not include a floor, and Palram says its Hybrid has no floor or base included.
Why does my greenhouse get so hot?
Small greenhouses heat up fast, even on cool, sunny days. University of New Hampshire Extension recommends an automatic vent opener for spring and fall and roll-up sides in summer, and North Carolina State Extension says opening the door usually solves overheating. Shade cloth also helps in summer.
What should I grow first in a new greenhouse?
Start with the easy crops. University of New Hampshire Extension suggests starting cold-tolerant seedlings like kale, cabbage, broccoli and onions in April, and tomatoes, peppers and eggplant in large pots after mid-May in New Hampshire. Adjust the dates to your own last frost date.
Do I need a permit for a backyard greenhouse?
Possibly. University of Georgia Extension notes that building permits are usually required for greenhouses, and the size threshold for small structures varies by city and county. HOAs may add rules on color, size and visibility, so ask both before you order.
Is a tunnel greenhouse a good first greenhouse?
It can be a low-commitment way to get a lot of growing space, with a PE cover on a steel frame. It is a seasonal structure: the cover wears out, it does not insulate like polycarbonate and it needs careful anchoring against wind.